Considering I’ve made quite a few wedding cakes, my procrastination on putting together this instructable is slightly shameful. Making a wedding cake is fun, boring, painful, exciting, tiring and something that will fill you with pride, whether it’s for yourself or a friend. There’s little better than watchign people enjoy something you’ve created.
The cake in this instructable is a two tier fruit cake, decorated with gorgeous bright red poppies. This is a design specific to my friends’ desires, but I have attempted to expand the instructable to cover making wedding cakes in general, from the ambitious planning stages to the nervewracking final set up. This may have led me to ramble a little more than I should, but buried amongst that are the little tips & tricks I’ve picked up a long the way.
The only way to learn is try, fail & try again, so get out there & give it a go.
Step 1: Ingredients and Equipment

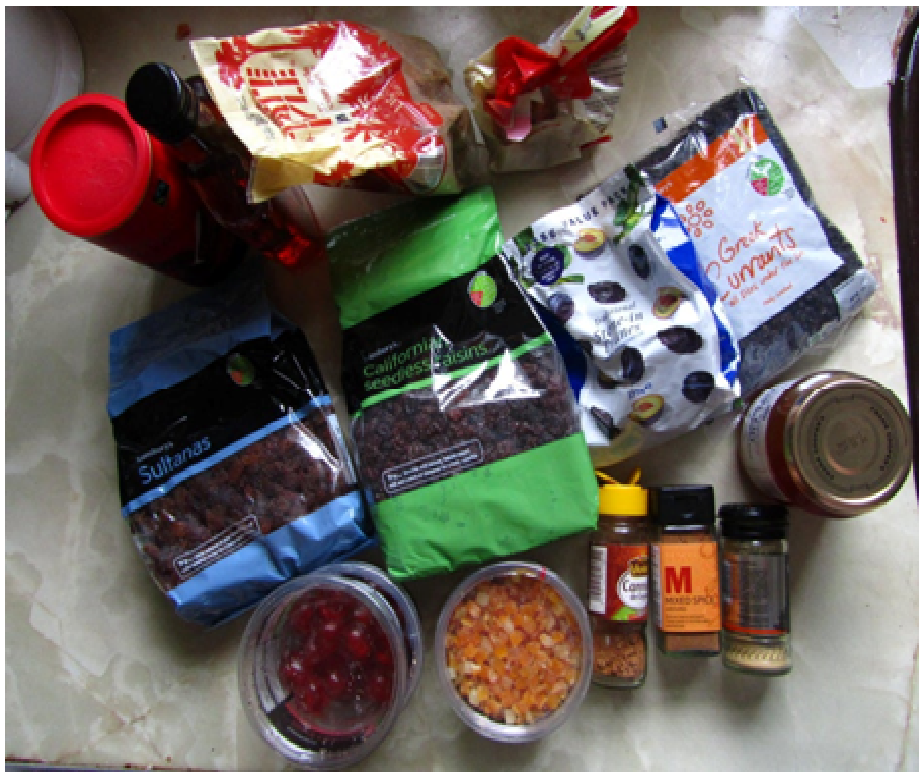
For the fruit mix (makes enough for a 9 inch round cake):
800 g sultanas
320 g raisins
185 g currants
155 g glace currants, quartered
250 g pitted prunes, chopped
125 mixed peel
250 ml brandy (this can be partially or completely substituted with fruit juice)
55 g brown sugar
80 g marmalade
1 tbsp cocoa powder
1/2 tbsp ground cinammon
1 tsp ground ginger
1 tsp mixed spice
1/1 tsp ground nutmeg
For the cake batter:
250 g unsalted butter
230 g dark brown sugar
2 tsp grated orange zest
2 tsp grated lemon zest
1 tbsp black treacle
4 eggs
250 g plain flour
60 g self raising flour
You will also need spoons, scales or measuring cups, bowls, and other general kitchen equipment, and cake tins. For the cake pictured I made a 9 inch and a 7 inch cake, both of which were quite deep, which used 2x the fruit cake recipe in all. Adjust this according to the size of your tins.
For those without scales, a good weight to volume converison guide can be found here.
For the poppies:
Flowerpaste (red and green)
Wires (gauge 30 and 24)
Stamens
Poppy petal cutters
Edible glue (CMC)
Petal dust (red, black and green)
Modelling tools
Pliers and wire cutters
Florists tape
Petal veiner (or a modelling tool and some patience)
Paintbrushes
For icing the cake:
Marzipan
Sugarpaste (fondant)
Marmalade
A cake drum for the base (I used a 12 inch)
A cake board for the top tier (I used an 8 inch)
Dowels
Posy picks
Cake smoother (optional but very handy)
Turntable (optional, I manage without one at home, but it does help to get a smooth even finish)
Rolling pin
Small sharp knife
Paintbrush
Cake boxes if you will be moving the cake to another venue
Step 2: Planning

When making your own or someone elses wedding cake, timing is key. You will need to work out how much time you realistically have in the week leading up to the wedding and plan things accordingly. Decorations such as flowers, toppers and some royal icing shapes can be made quite a while beforehand to remove the stress in the immediate lead up to the big day.
Planning your time can affect everything about your cake, right down to the flavour. Filled sponge cakes are best baked as close to the day as possible, and baking enough for a couple of tiers can take a lot of hours in mixing, baking and cooling. Opting for a traditional fruit cake, on the other hand, allows you to make the cake in advance. In fact this is preferable since an important step in making fruit cake is feeding it with a regular spoonful of brandy or sherry every few days for at least a couple of weeks, to make it gorgeously moist and alcoholic.
The type of cake and tightness of time will also affect your icing decision. While it doesn’t have the best taste, and is often left on the side of the plate, sugarpaste (fondant) will keep a cake fresh under it’s protective layer for a couple of days, and provides a smooth, clean surface to adorn with decorations. On the other hand buttercream or ganache, while tasting delicious, should be applied as late as possible, the night before at the earliest, which could leave you panicking over last minute problems.
Once you have decided on the cake flavour, you’ve got to make sure you’ve got enough of it. I have provided a table of rough portion guides for a few sizes of cake, based on the small servings you typically get at a wedding. If you are planning on being generous, make more cake, it’s pretty simple.
Once you have those initial considerations out of the way you can start planning. Look for inspiration, take it, twist it and make it your own. Sketching out a rough idea of the cake, even it ends up looking little like it, can help keep you focused throughout the process.

